
What’s New: 3 Attendee Management Tools for Greater Flexibility
No two events are the same”which means no two diagrams or guest lists are going to look and act the same. We released the latest batch of updates with those truths in mind, for greater flexibility to when manage attendees, seating arrangements, and templates.
Now you can easily customize your attendee lists, specify special seating arrangements with your templates in a snap, and group and ungroup attendees to make last-minute changes a breeze. In the end, this makes events easier to manage and control.
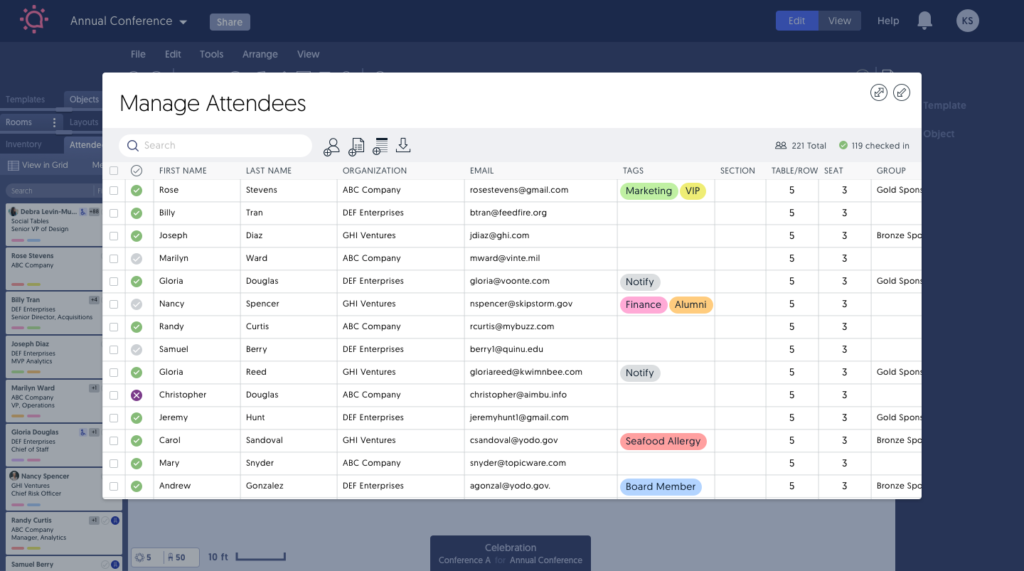
1. Easy Attendee Grouping
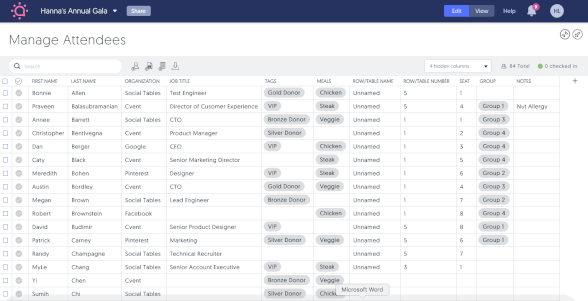
You can now quickly create groups from the attendee management tool. Start by selecting the desired attendees and then click the “Group” icon in the toolbar. This will assign all selected to the same group.
When you seat one attendee in a group, the application will automatically seat the remaining group members at the same table”which takes our seating software to the next level.
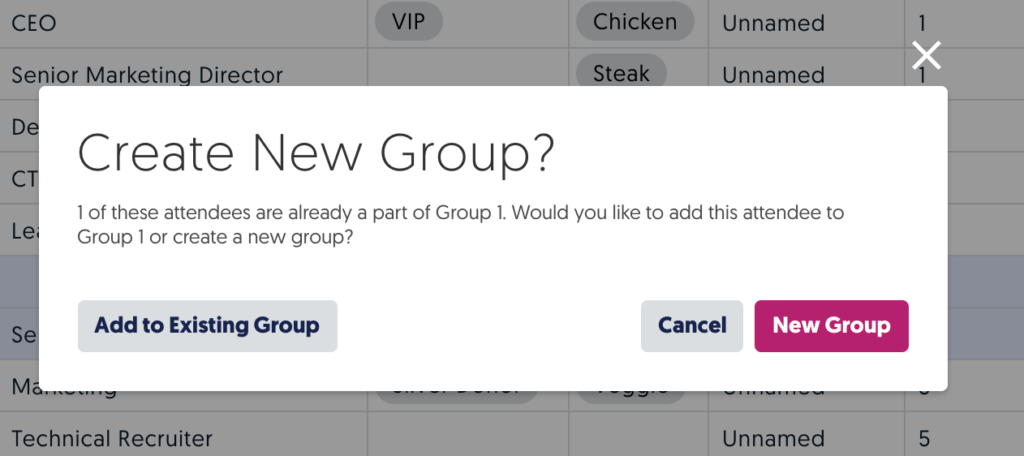
You can also add additional members to an existing group. Just select the attendees you want to add to a group, plus at least one attendee already assigned to the desired group. Then click the “Group” icon.
When prompted, click “Add to Existing Group”. Or, you can create an entirely new group with the selected attendees by clicking “New Group.”
You can also remove attendees from groups by clicking the “Ungroup” icon in the toolbar. All the selected attendees will be removed from their groups.
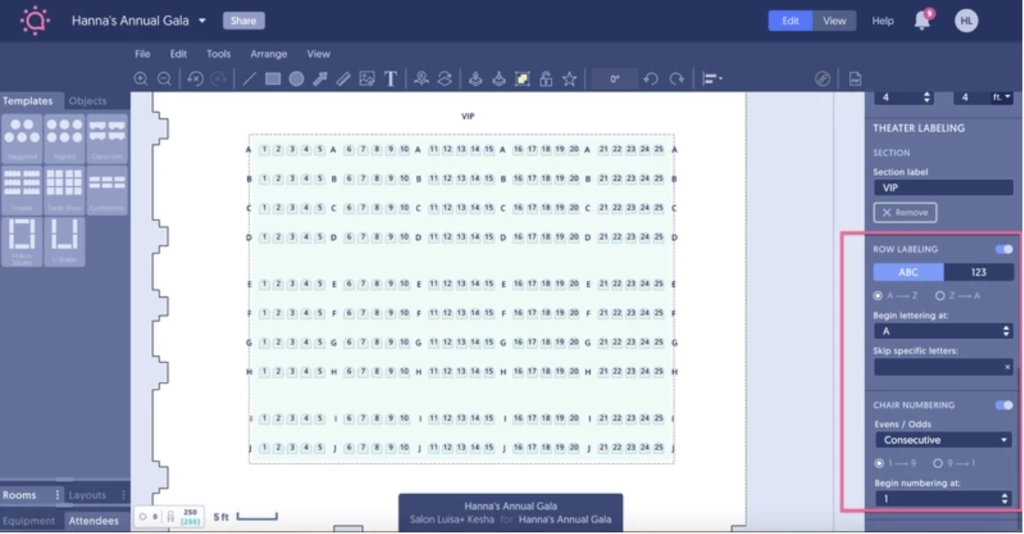
2. Custom Template and Chair Labels
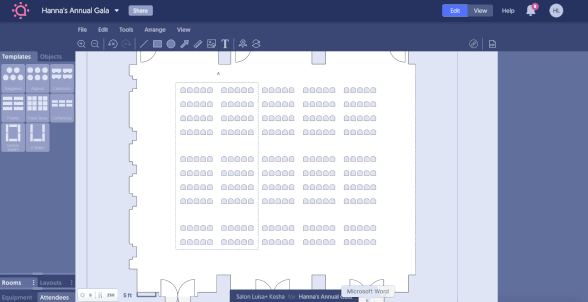
Until now, you could only create one section label per template in Event Management Solution. But with our most recent update, we have made it much easier for you to create and customize multiple section labels.
You can select a desired group of theater seats (Shift + Click + Drag) and provide a section label on the right panel (see below).
You can create as many sections as you need within a single template and the labels will only apply to the chosen section.
You can easily add an additional group of seats to an existing section in two simple ways:
- Expand the current selection while highlighted
- Select the original section and the additional desired section
You can create different types of sections, which permits unique combinations that meet your specific setup needs.

And you can quickly remove section labels by highlighting the section and then clicking the “Remove” button.

You are also given new flexibility to label rows and seats.
Just select the template and toggle on “Row Labeling.” You’ll have the option to select between alphanumeric or numeric labeling”even assigning specific preferences such as ascending/descending order, numbers/letters to begin at, and certain numbers/letters to skip (such as seat #13).
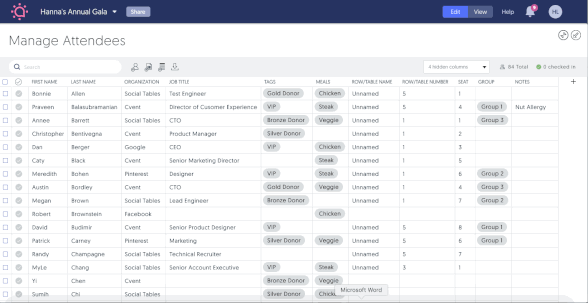
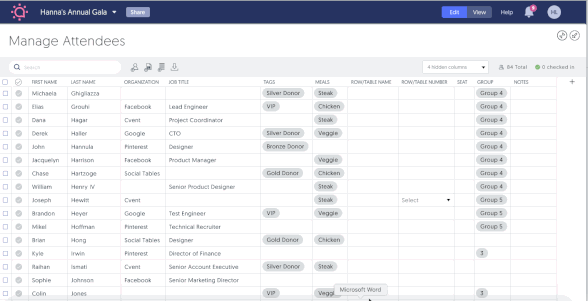
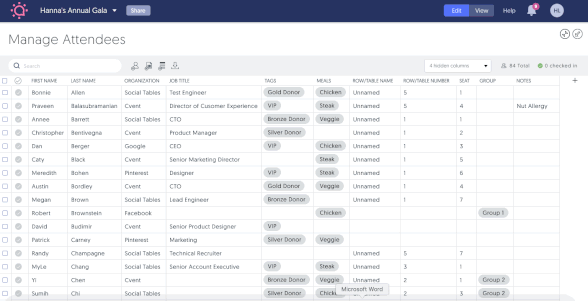
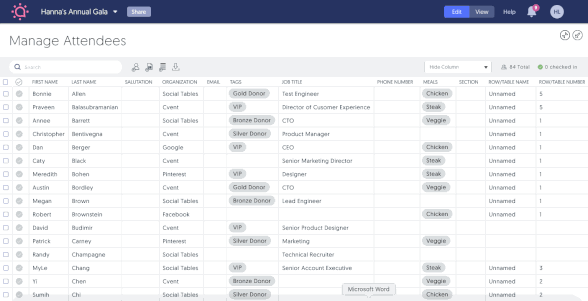
3. Reorder Attendee Management Columns
You can reorder columns in the attendee management tool in Event Services Solution by clicking the column header and dragging it left or right. A blue bar will appear among the headers to indicate the column’s new location. This will be the location for your column on its specific diagram. It will not move back to its original location after you log out or refresh the page.
Log in to your account today, because you shouldn’t wait until another moment to start customizing your attendees experience.
Be sure to bookmark our Product Updates page, where we’ll share another What’s New post every week”because you should always know how to get the most out of your events with Social Tables.
Get started with Social Tables!
Free Event Management Software for Planners and Properties

See Data Privacy Info
By clicking 'Sign Up', you consent to allow Social Tables to store and process the personal information submitted above to provide you the content requested. Refer to our Privacy Policy or contact us at privacy@cvent.com for more details.